Adding Menus
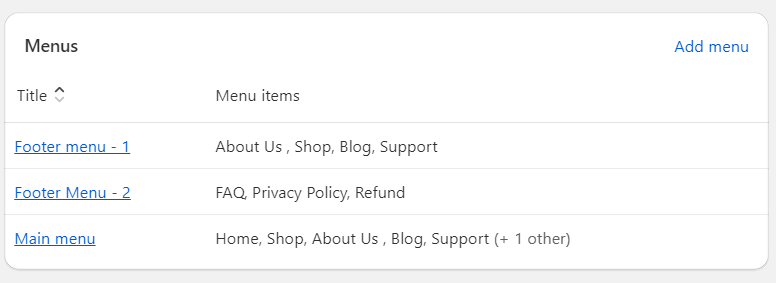
Store Page > Sales Channel(left hand side) > Navigation
In the Menus section, the following menus need to be added using the “Add Menu” button, the links within can be changed
Adding Menu Items
To add menu items to your menus, perform the following steps:
- In your Shopify admin panel, go to “Online Store” and then “Navigation.”
- Click on the menu to which you want to add items.
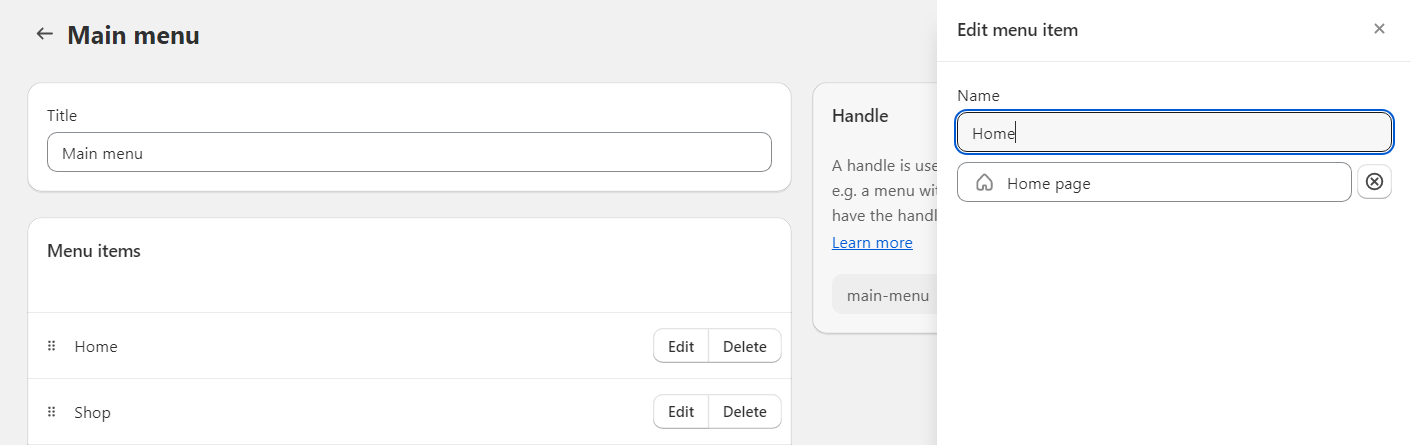
- Click on the “Add menu item” button.
- Enter a name for the menu item in the “Name” field.
- Specify the destination URL for the menu item in the “Link” field.
- Optionally, you can set the item as a dropdown by selecting a parent menu item from the “Parent item” dropdown list.
- Click on “Save menu” to add the menu item.
Organizing Menu Items
To organize and rearrange menu items within a menu, follow these steps:
- In your Shopify admin panel, navigate to “Online Store” and then “Navigation.”
- Click on the menu you want to organize.
- Drag and drop the menu items to rearrange their order.
- If you want to create a nested menu (submenu), drag a menu item slightly to the right and drop it below another menu item. It will become a child item or submenu.
- Click on “Save menu” to save the changes.
Linking Menus to Your Store
After creating and customizing your menus, you need to link them to your store’s theme locations. To link a menu to a specific location, follow these steps:
- In your Shopify admin panel, go to “Online Store” and then “Navigation.”
- Click on the menu you want to link.
- Click on the edit button .
4. Click on the Link input and select from the dropdown menu list.
How to Customize Menu
To customize the menu in Shopify themes, follow the steps below:
Step 1: Access the Theme Editor
Log in to your Shopify admin panel and navigate to “Online Store” and then “Themes.” Find the theme you want to customize and click on the “Customize” button. This will launch the Theme Editor.
Step 2: Navigate to the Menu Settings
In the Theme Editor, look for the section related to the menu. It may be labeled as “Header,” “Navigation,” or “Menu.” Click on it to access the menu settings.
Step 3: Add a New Menu
If you want to create a new menu, click on the “Add a menu” button. Give your menu a name and save it.
Step 4: Configure the Menu Structure
Once you have created a menu, you can start adding menu items. You can add links to pages, collections, products, or external URLs. In the menu settings, you’ll find an option to add a menu item. Click on it and provide the necessary information such as the name, URL, and link type. Repeat this step for each menu item you want to add.
Step 5: Organize the Menu
To organize the menu items, you can use drag and drop functionality. You can move the menu items up or down to change their order or nest them under other menu items to create submenus.
Step 6: Customize Menu Appearance
Depending on your theme, you may have options to customize the menu’s appearance. Look for settings related to colors, fonts, spacing, and layout. Use these options to match the menu with your desired design.
Step 7: Save and Publish
After customizing the menu, make sure to save your changes. If you are satisfied with the modifications, click on the “Publish” button to apply the customized menu to your live store.
Step 8: Preview and Test
Before finalizing the changes, it’s a good idea to preview your store to see how the customized menu looks on different devices and screen sizes. Additionally, test the menu by clicking on each link to ensure they navigate to the intended pages.